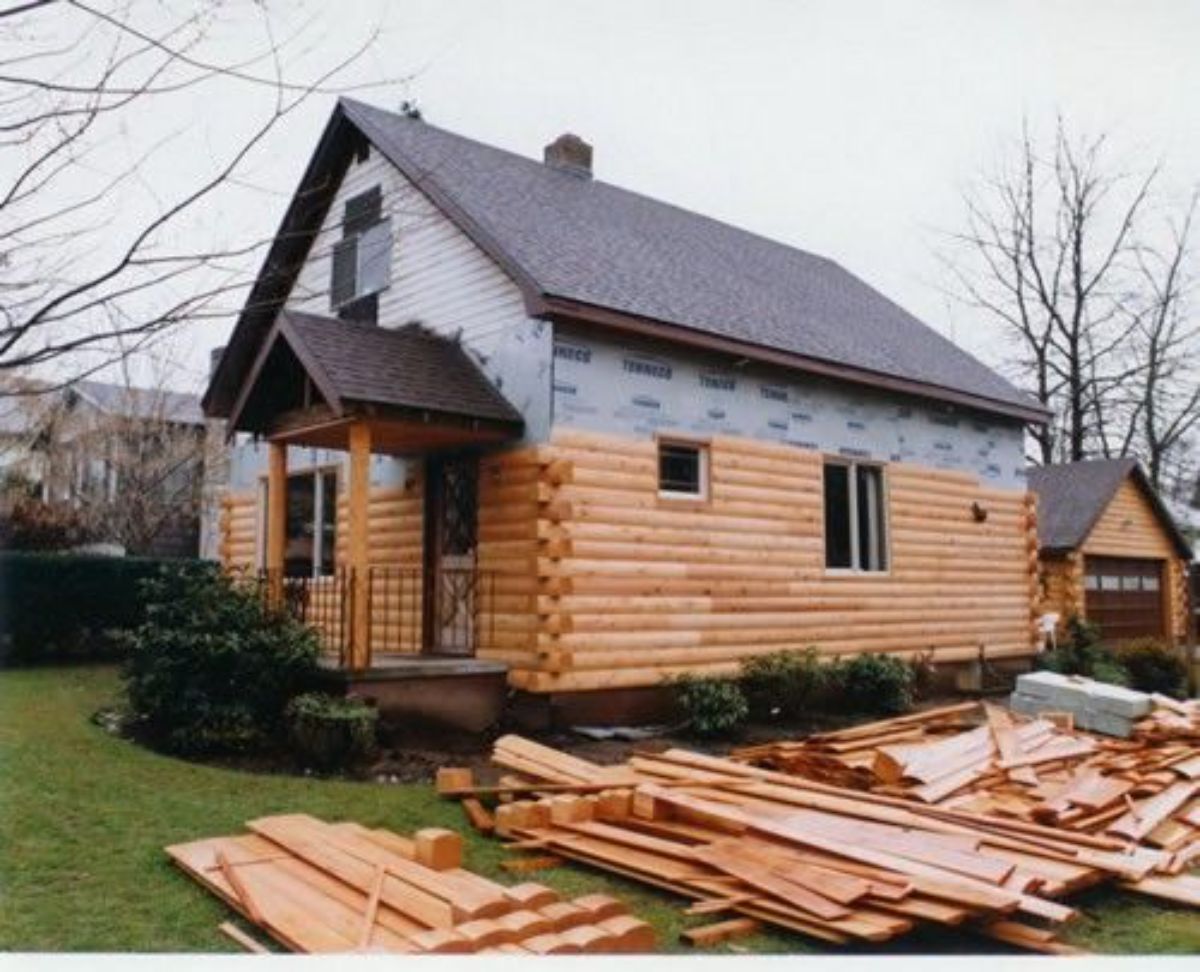
Here we’ll show you how to install log siding to achieve the log cabin look on a framed house. You can have a rustic cabin feeling without using logs.
Log cabin siding can be purchased from log cabin suppliers as well as big box stores and lumber yards, and local wood mills. It is manufactured from kiln-dried wood to minimize the effects of swelling and shrinking.
Jump to:
You can build a standard framed wall and install log siding easily on nearly any flat surface. This is especially useful if you’re working alone or have limited helpers. If necessary, you can buy end-matched log siding that means end-butt joints don’t need to land on a stud.
Other benefits of installing log siding include:
- You are able to fully insulate and wrap the wall. Add rigid foam board for super insulation.
- Log siding is rigid enough to span across longer spaces between studs. This is helpful on older homes where 16” on-center studs weren’t standard.
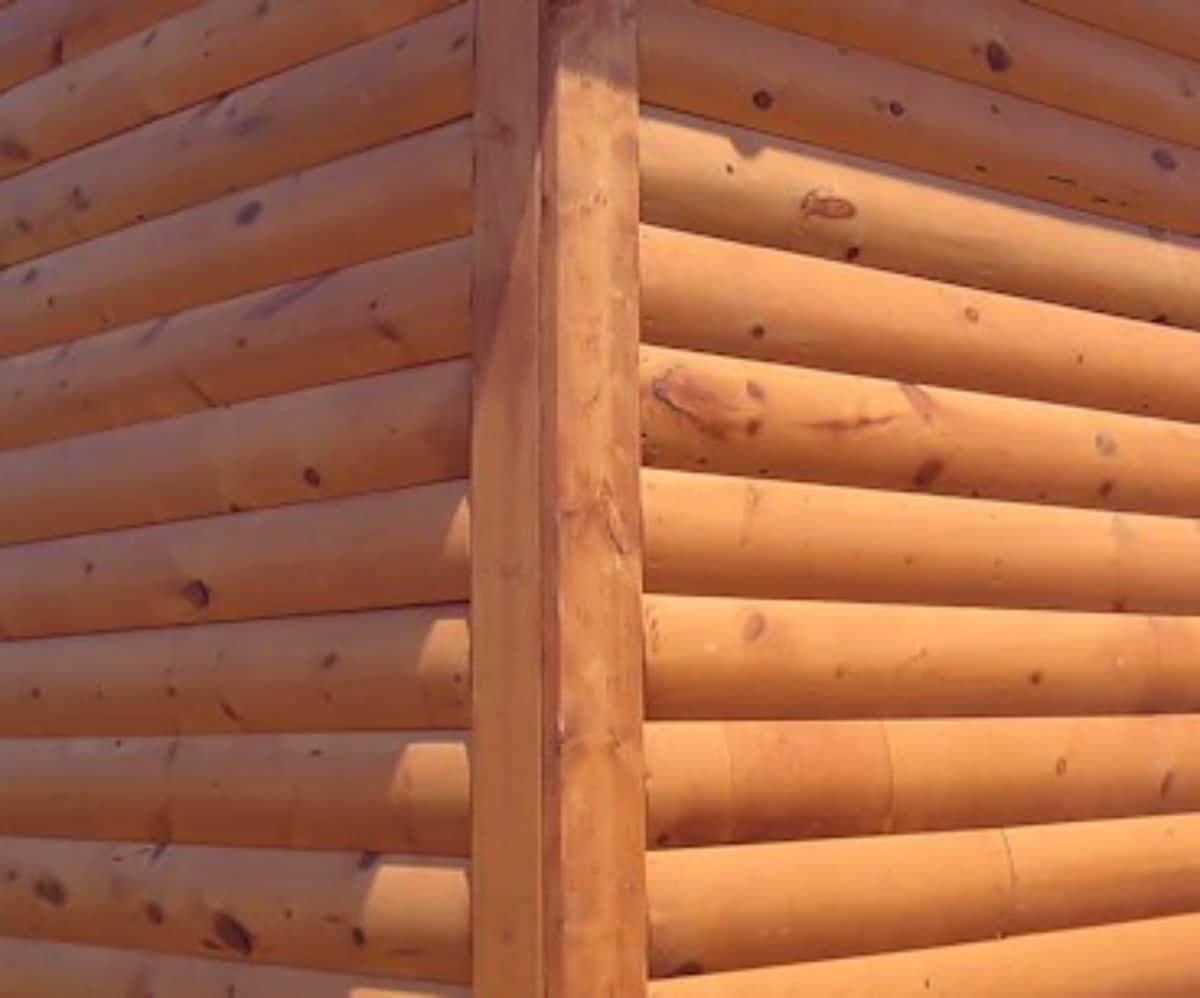
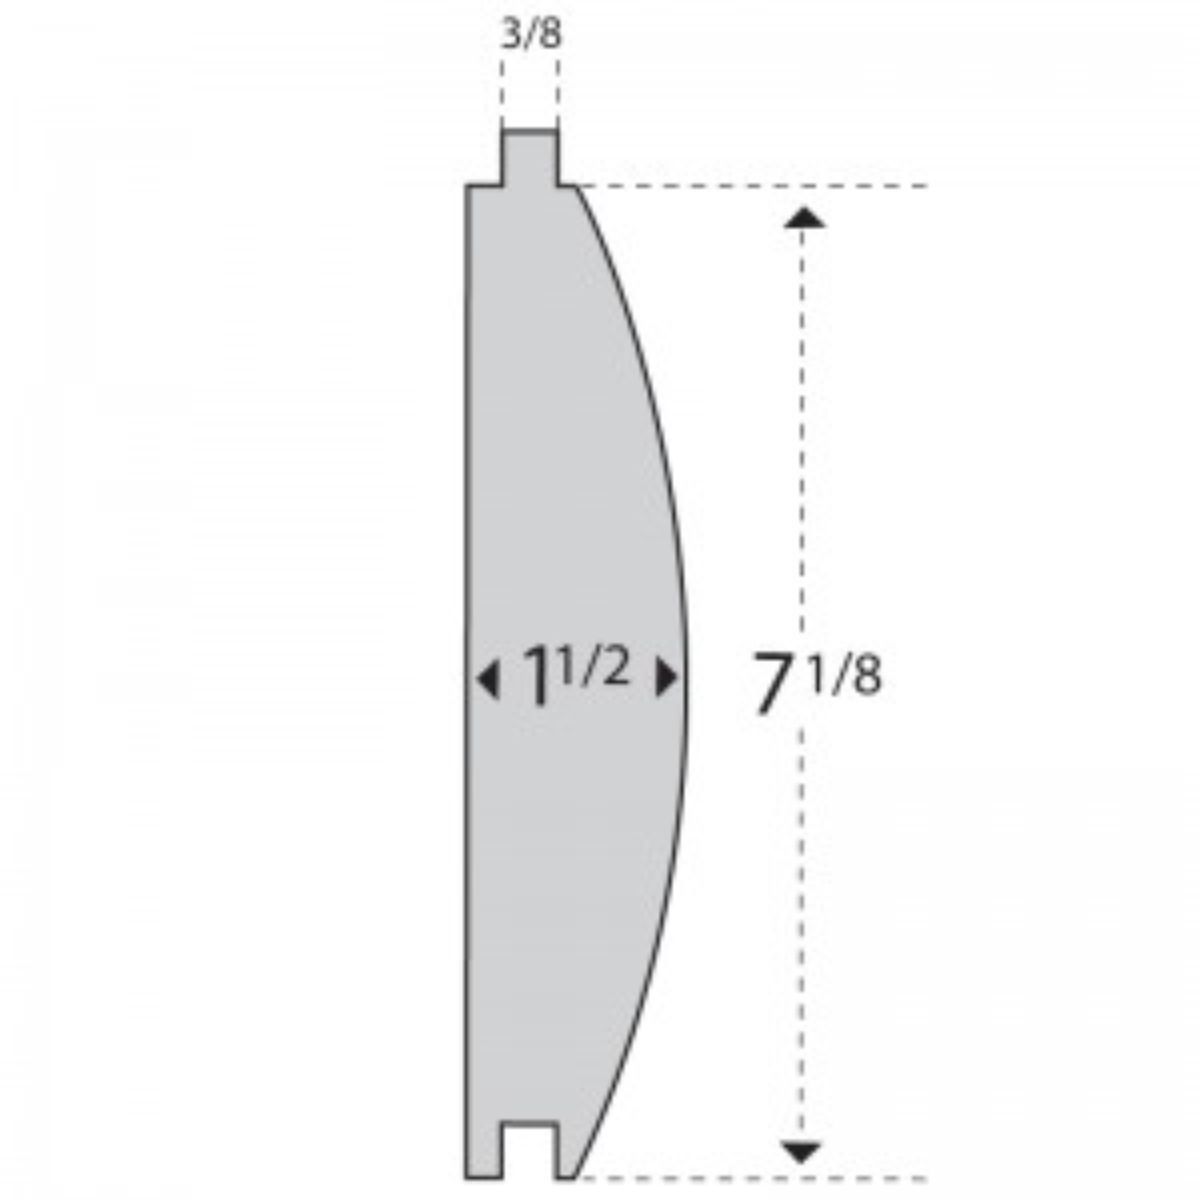
- Choose between different looks and log styles, such as half-round, beveled, tongue-and-groove, or chinked. You can also choose milled or hand-hewn siding.
How To Install Log Siding
Wrap your house
Use a moisture barrier, such as Tyvek or Rex Wrap. This provides a weather-resistant barrier that prevents rain and air from getting into the wall assembly but still allows water vapor to pass to the exterior. You could also use traditional felt or building paper but this covers a smaller area.
House wrap installs faster and is lighter as well. House wrap acts as a barrier plane to prevent liquid moving in but allowing vapor to pass. Be sure and seal all edges well with sheathing tape, but leave the bottom unsealed to allow any trapped moisture to drain.
Trim and Corners

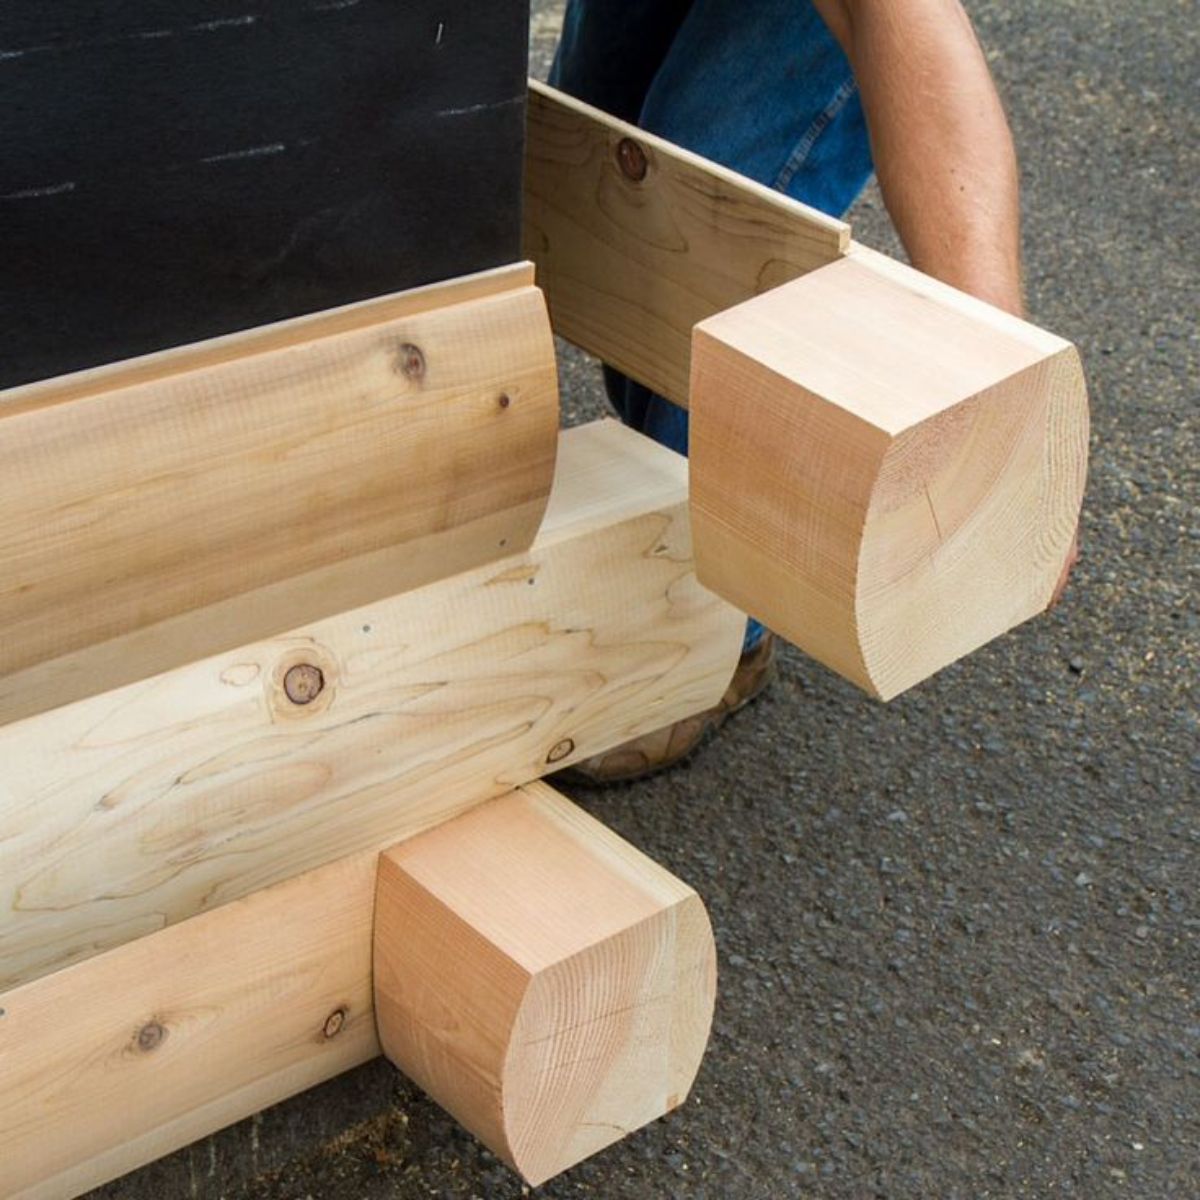
2”x4”’s work fine for corner boards but wider width lumber give a heftier, more substantial look. Because of the overlap you can use one size down for one side of each corner pair.
For example, install a 2”x6” on one side of the corner, lined up with the edge of the corner. The second part of the corner would be a 2”x8", lapping over the 2”x6”. Because of the nominal lumber dimensions (a 2x6 measures 1-½” x 5-½” and a 2x8 measures 1-½” x 7-¼”) this gives a corner piece measuring 7-¼” x 7”.
When you install the log siding it will butt up against the corners and window trim. Add a bead of log caulk along the vertical joint where the log siding meets the corner board. Push the end of the next course of siding into the sealant to seal the joint.
Another option for corners is to use specially cut corners that imitate the look of an overhanging log corner.
Install Log Siding
Start at the bottom and work your way up the wall. Snap lines with a chalk line or use a story pole to ensure your log siding stays level and evenly spaced. Be sure to use exterior galvanized nails or 2-⅝” coated deck screws to install the log siding. These deck screws have mini heads that are easily hidden. These are easily driven with a screw gun and won’t work loose with freeze/thaw cycles.
Check your level as you go along to ensure the siding is being installed straight. It’s best to use at least a 4-foot level for accuracy.
Chinked Log Siding
If you want to get that traditional chinked log look you can leave spaces between courses of log siding that you will fill later with chinking material. You can save on chinking by cutting spacer strips. Use ½” plywood or OSB and rip 8-foot strips to the desired width of chinking.
These spacer strips are installed between siding courses to support the next piece of log siding and reduce the amount of chinking needed. Cover the spacer strips with a packing tape or 4-mil plastic to ensure the chinking does not stick to it.
To handle expansion and shrinking the chinking must stick only to two spots: the top of the board below and the bottom of the board above. If you don’t use spacer strips, another option is to use backer rod to allow for movement.
Chinking
We recommend Sashco Log Jam acrylic latex chinking. The modern formulation remains flexible and strong through a wide temperature range and does not require you to re-chink your walls every few years. In addition, you can buy it in different colors to match your log siding stain.
Finish Log Siding Installation
Rip the last piece of log siding to the size required to fit snugly against the soffit and caulk the edge to seal it. Lightly brush the log siding to remove any sawdust before you apply log stain. We’ve had good luck with TWP (Total Wood Preservative) stain.
Install Log Siding on Interior
You can also install log siding on an interior wall to create the log cabin look inside your home.
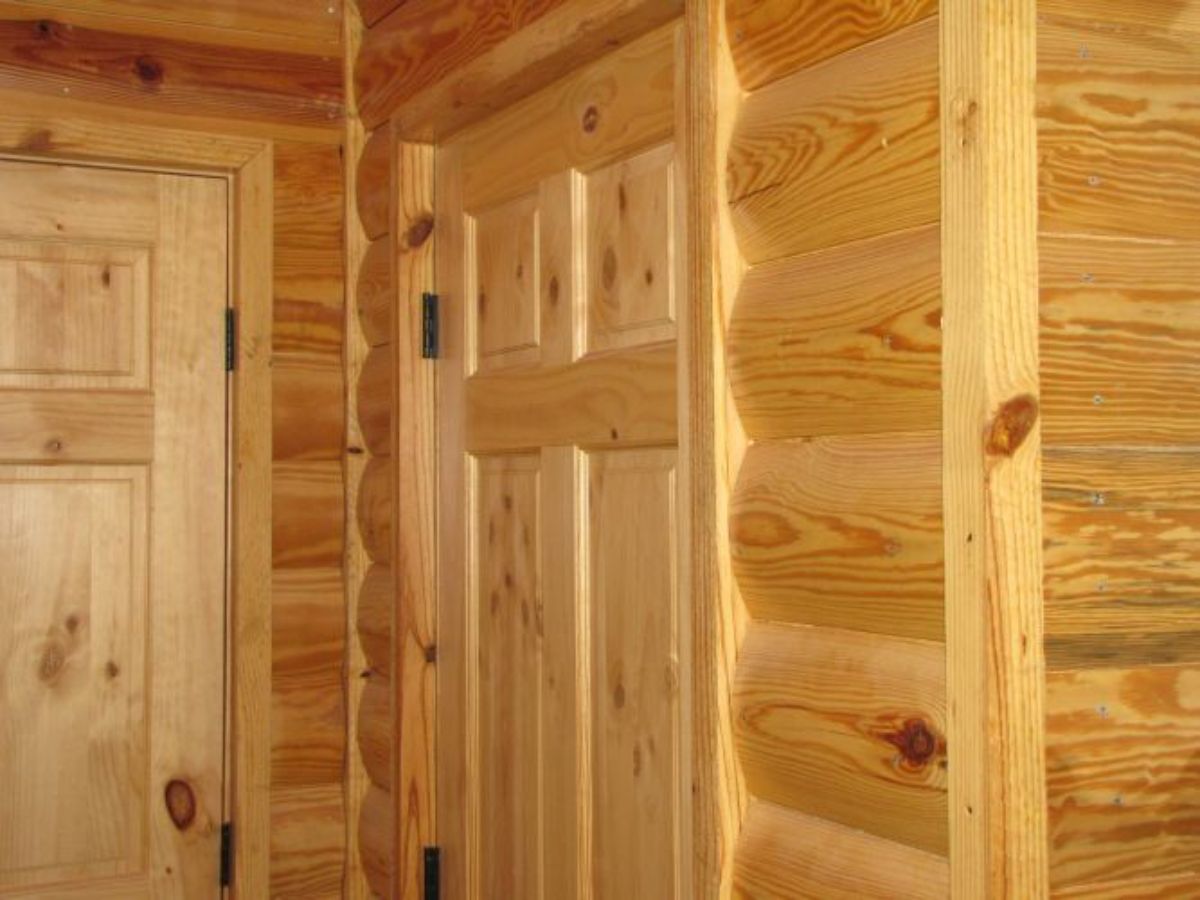
On inside corners you can rip down 2x2’s to install first in the corner. Then butt the interior log siding against these. Outside corners and door trim is done in the same manner as outside.
Learning how to install log siding can save you money if you plan to do it yourself. Even if you hire someone else to install the log siding, understanding the process helps you to ensure that it’s being done right. Instead of building a log home, consider using log siding to give you the log cabin look.
More Log Home Design Pages:
REScheck: Tricks of the Trade REScheck is software designed to compute an energy compliance analysis that is needed for building permit applications.
Log Cabin Design Tips Tips for your log cabin design that will save you money.
Aging In Place Ideas for Your Log Cabin As people become older, remaining in their own home becomes more important and aging in place design can facilitate that.
Log Cabin Home Design – Evaluating All the Factors The ideal log cabin home design is different for everybody and must be determined after evaluating all the factors involved.
Tips for Building Stairs These tips for building stairs will make quick work of your design.
Joe
Hello, want to install 3x10 inch log siding inside. Do I need to be concerned About this weight on the interior walls? Walls are covered with OSB and ceiling is already covered in OSB with 1/4 inch wood plank. Or would I need a structural engineer to inspect first? Thank you. Joe
Katie Hale
This is something you would need to check with your local regulations and code enforcement office for.
Jack Hertz
I am about to remove the plastic siding and install d log siding. I plan to wrap the house first but i have several questions.
Should i stain and seal the d logs before installation?if i do this i assume the caulk will not adhere?
Should i install furring strips to mount to?
Should i install insulation in the air gap? Or just install the d logs directly onto the house. The back side of the logs have their own milled out air gap.
Should I put dowels or biscuits between the flush ends or will the tung and grove on the bottom and top be enough.
I really need some advice. I have already purchased 2000 feet of D logs and 10 gallons of stain/sealer and a sprayer. Several bundles of PT furring strips. I got a bunch in materials already but
Caulk joints after install?
Caulk or use adhesive on tung and grove?